A child's profile
A child’s profile is the one page that holds everything SBDMS knows about a child: who they are, their guardians, their QR code, every dose ever recorded, and monthly notes from staff. All signed-in roles can open the profiles of the children they are allowed to see (see The Participants directory for the scope rules).
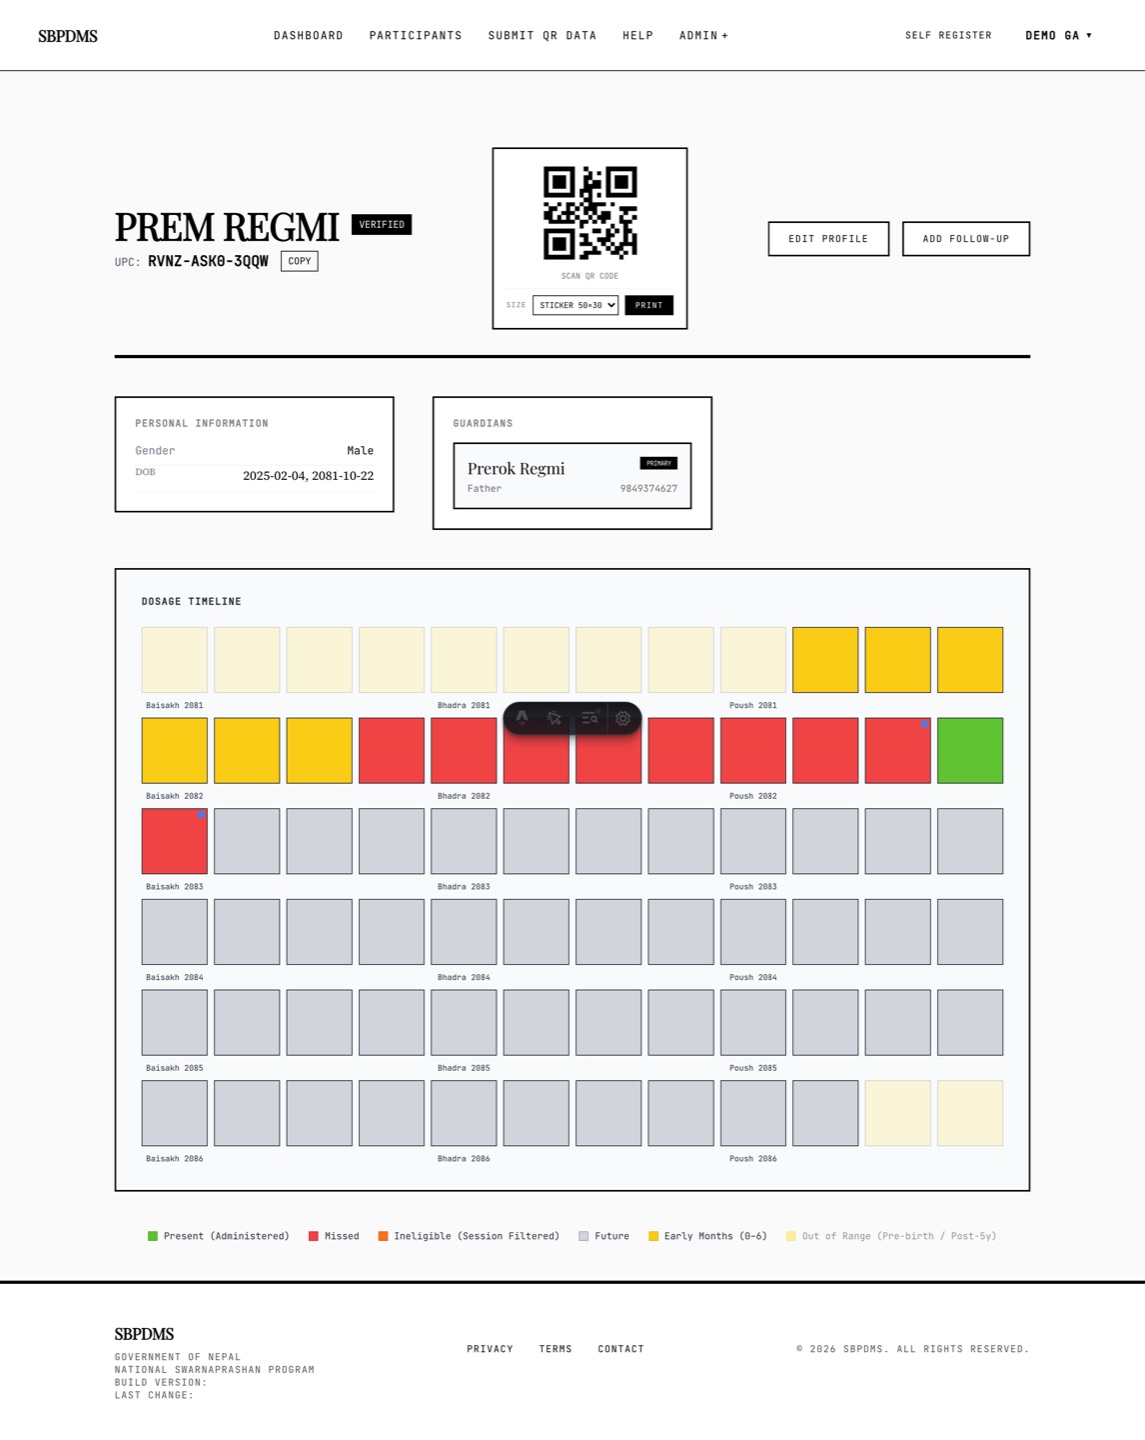 The top of a child profile: name, status and UPC on the left, the QR card in the middle, the action buttons on the right, then the Personal Information and Guardians panels.
Opening a profile
Section titled “Opening a profile”- From the directory, click the child’s name or the View button.
- From a guardian’s profile, click the child’s name in Registered Children.
- From the Prashan-day page, after a dose, use View profile.
While the page loads you see Loading profile…. If loading fails you see Error Loading Profile with a Try Again button.
The header
Section titled “The header”The header runs across the top of the page:
- The child’s name in large letters.
- A status pill:
VERIFIED(black) orSELF REGISTERED(white). - For a verified child, a green badge at [camp site] naming the site where the child was verified.
- UPC: followed by the code, and a COPY button that copies the code to your clipboard.
The “Back to camp day” link
Section titled “The “Back to camp day” link”If you reached the profile from the Prashan-day page, a small ← Back to camp day link appears above the header. Click it to return to the same camp day. The link only appears when you arrived that way.
The QR card
Section titled “The QR card”The white card in the header holds the child’s QR code. The code contains the child’s UPC. Scanning it at a camp finds the child instantly.
Below the code:
- Size — choose Sticker 50×30, A5 or A4. Your choice is remembered in this browser, so the next profile you print uses the same size.
- Print — opens your browser’s print dialog with only the card on the page: the title SBPDMS, the child’s name, the QR code and the UPC. Sticker is a 50 mm by 30 mm label for the child’s card; A5 and A4 give a larger code for a booklet or a binder.
- Download — saves an 800 by 800 pixel PNG of the card, useful for sending by message.
The action buttons
Section titled “The action buttons”| Button | Who sees it | What it does |
|---|---|---|
| Verify Registration | Everyone, only while the child is SELF REGISTERED |
Opens the registration form in verification mode, pre-filled with the child’s details. Disappears once the child is verified. |
| Edit Profile | Everyone who can see the child | Opens the edit form. See Editing a child or guardian. |
| Study & Analysis | Everyone | Opens the monthly remarks window with a month picker, so you can attach a note to any month (see below). |
| Add Follow up | Everyone | Takes you to the Prashan-day page with this child already selected, so you can screen and dose them on the active camp day. The usual checks still apply (the child must be verified, one dose per camp day, and so on). |
| Change Verification Campsite | SuperAdmin and GeneralAdmin | Opens a small window showing the current verified-at site and a dropdown of all sites. Pick one and click Save. The change is recorded in the audit log. |
| Push SMS | Everyone (greyed out) | Not available yet. The button is disabled and says Coming soon. |
On a phone the buttons wrap onto several lines but keep the same order.
Personal Information
Section titled “Personal Information”The first panel in the left column shows:
- Gender
- DOB — date of birth
- Current Age — worked out from the date of birth, for example
2 yrs 4 mos
Address and phone are not here. They belong to the guardian; open a guardian from the next panel.
Guardians
Section titled “Guardians”The Guardians panel lists every guardian linked to this child. Each card shows the guardian’s name (click it to open their profile), their relation to the child and their phone. The primary guardian’s card has a black border and a black Primary badge. There is exactly one primary guardian per child; they are the default contact on reports and the default accompanying guardian on the Prashan-day page.
You cannot add or remove guardians here. Use Edit Profile.
Prior doses banner
Section titled “Prior doses banner”If the child had doses before SBDMS was used (recorded from the paper register at registration), an amber panel headed Prior doses (paper register) appears above the timeline. It shows the count as N / 60 lifetime and, if given, the Source of that information. If the count is zero the panel is not shown.
The dose timeline
Section titled “The dose timeline”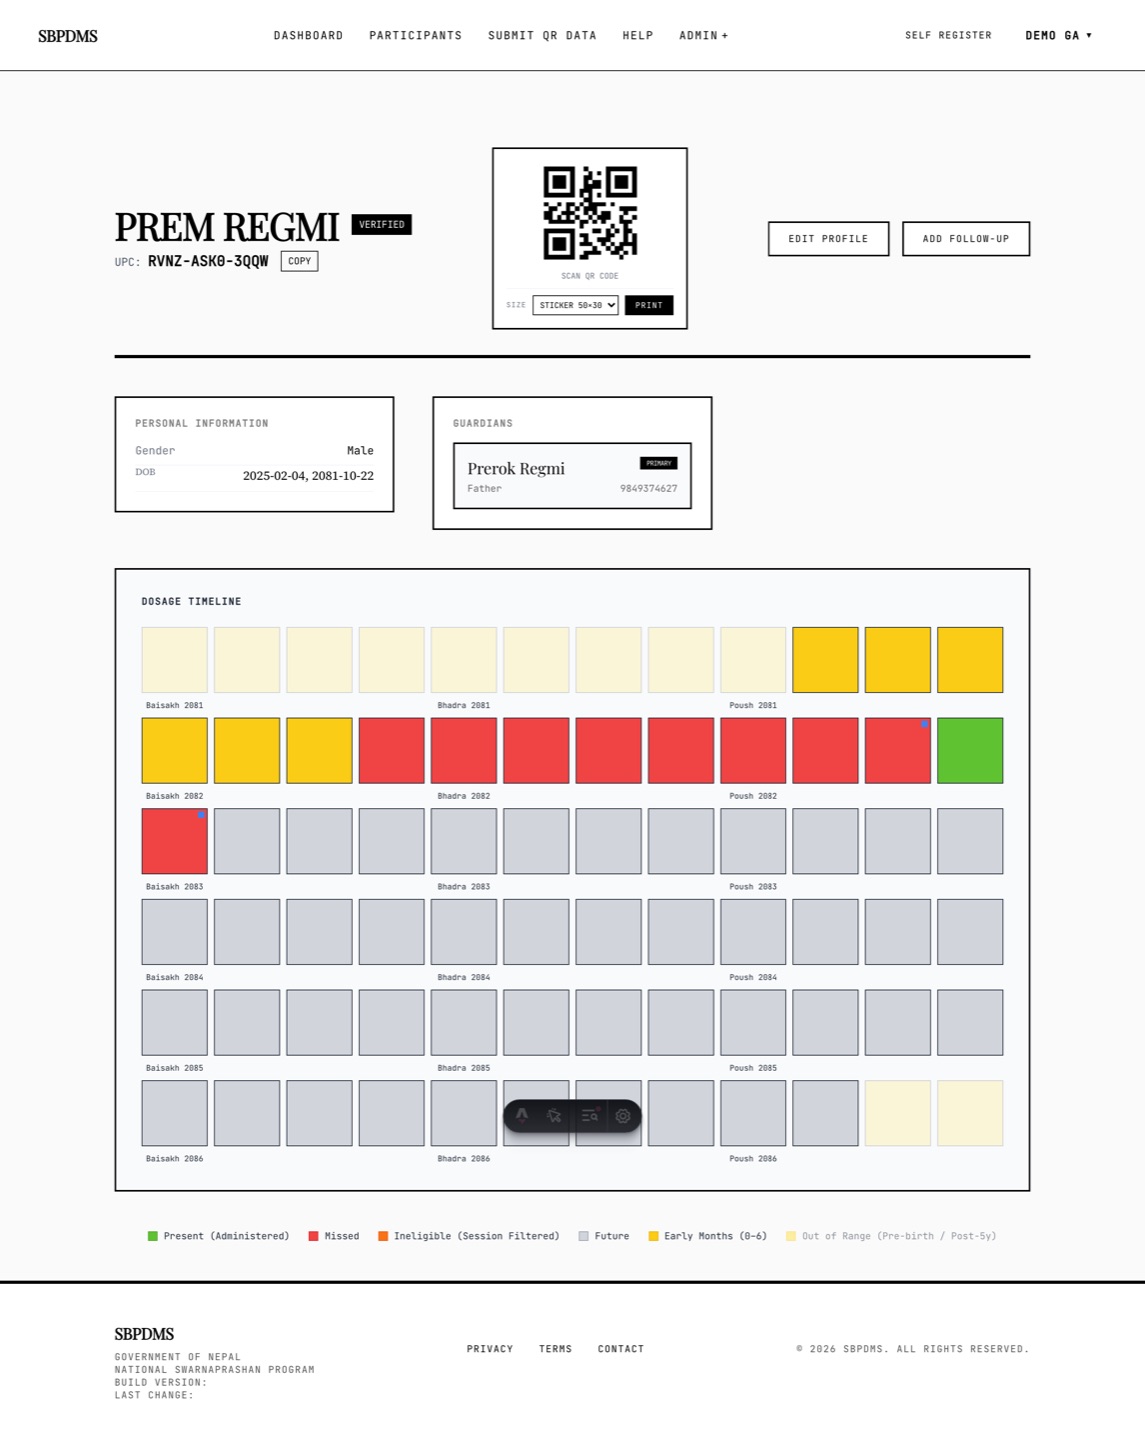 The Dosage Timeline: one row per Nepali year, one tile per Nepali month. The legend under the grid explains every colour.
The Dosage Timeline is a grid of small squares. Each square is one Nepali (BS) month of the child’s life, from the year of birth to five years later. Each row is one Nepali year, running Baisakh to Chaitra from left to right. Every fourth tile has a small label under it, for example Jestha 2082, so you can find your place.
Why Nepali months? Camp days, the Anusuchi registers and parents all work in the BS calendar, so the grid matches the paper record.
Tile colours
Section titled “Tile colours”| Tile | Meaning |
|---|---|
| Green | Present (Administered): a dose recorded in SBDMS that month. On a large screen the lifetime dose number is printed inside the tile; when two doses fall in one month you see both numbers, such as 24,25. |
| Pale green (see-through) | Prior (Guardian-reported): one of the prior paper-register doses. SBDMS does not know the real months of these doses, so it paints them onto the earliest empty eligible months. They are a visual estimate, not a record. |
| Red | Missed: an eligible month in the past with no dose. |
| Orange | Ineligible (Session Filtered): the child came to a camp that month but was excluded at screening. |
| Grey | Future: a month that has not happened yet. |
| Yellow | Early Months (0–12): the child’s first year. Prashan is not given under one year of age, so these months are never “missed”. |
| Faint yellow | Out of Range: months before birth, or after the fifth birthday. |
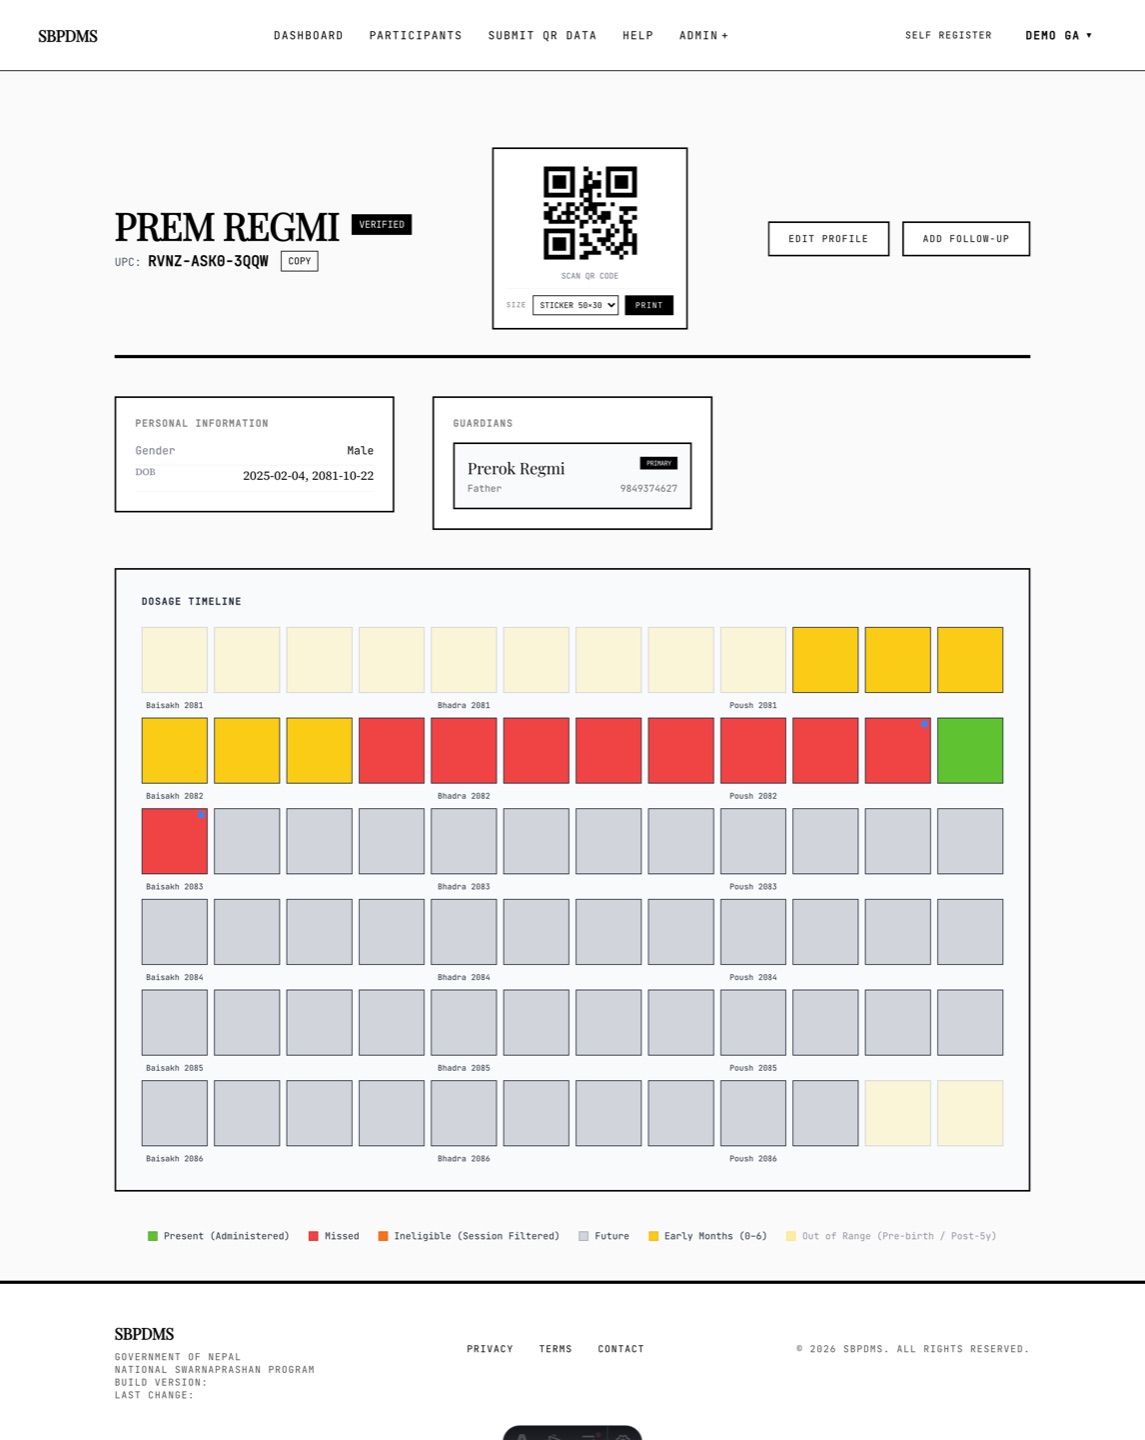 The lower part of the profile: the last rows of the timeline and the colour legend.
A small blue dot in a tile’s top-right corner means at least one remark has been saved for that month.
If the guardian reported more prior doses than there are empty months to paint, an amber note under the grid tells you how many could not be placed.
Clicking a tile
Section titled “Clicking a tile”Click any tile except an out-of-range one to open the remarks window for that month (below). There is no hover tooltip; the window carries the detail.
The remarks window
Section titled “The remarks window”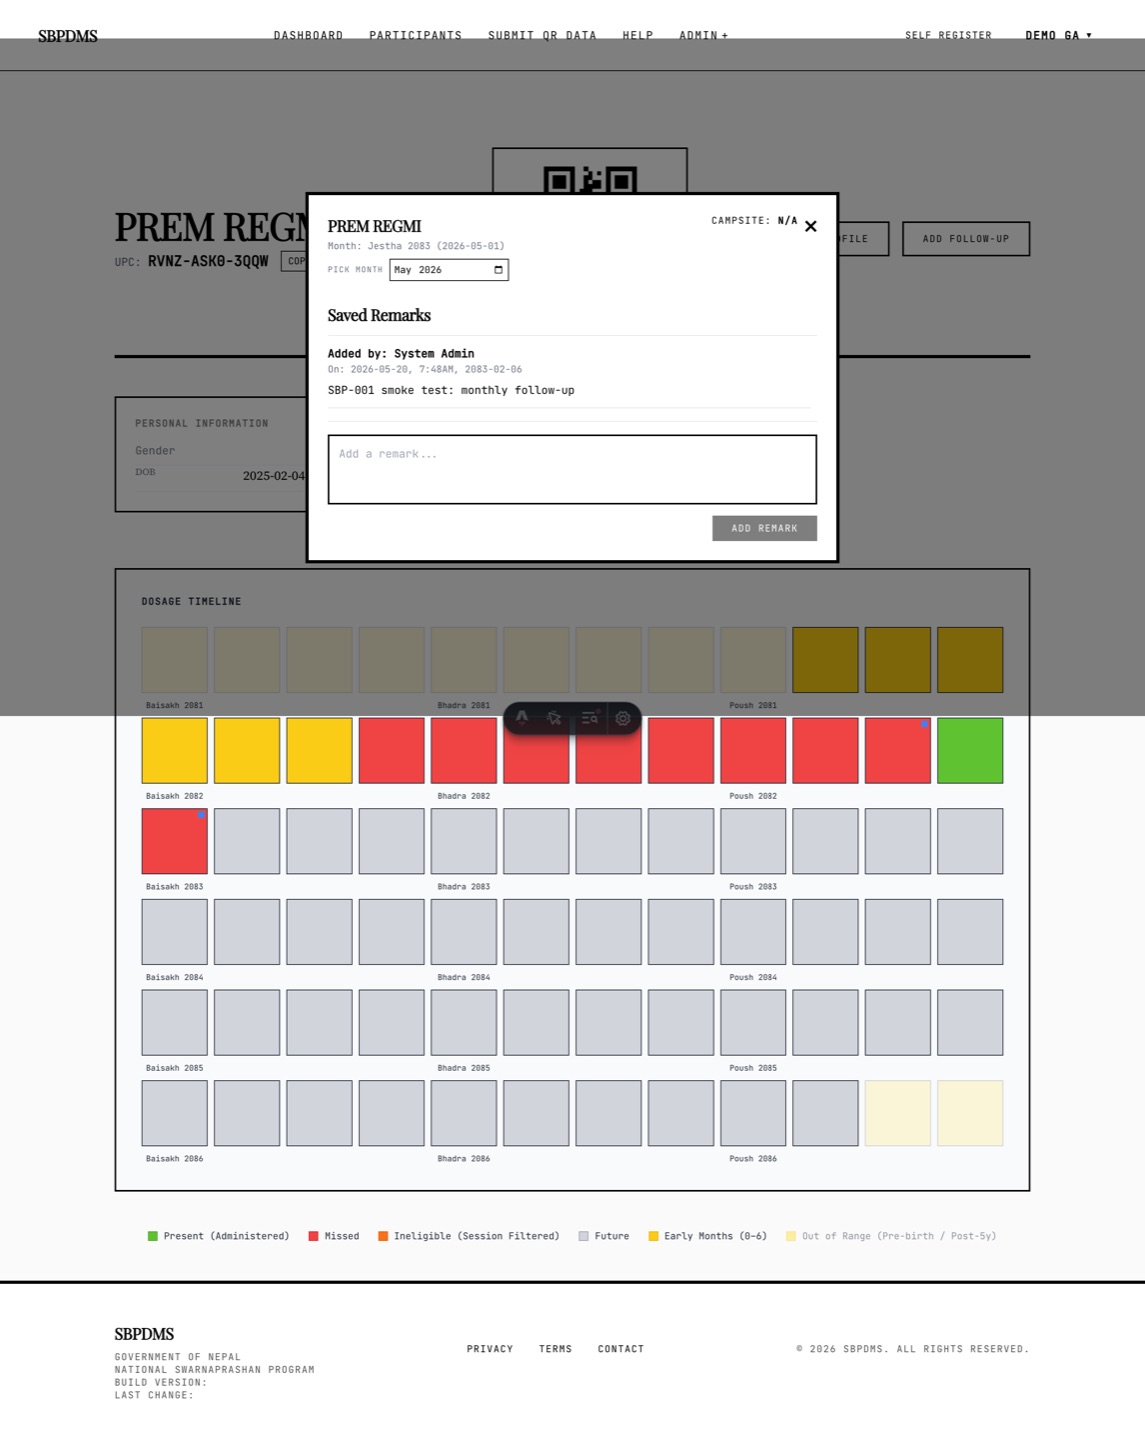 The remarks window opened from Study & Analysis, with the Pick month control at the top.
The remarks window opens over the page. From top to bottom:
- The child’s name. For a green tile, the word PRESENT in green.
- Month: the Nepali month and year, with the first day of that month in AD in brackets.
- Campsite: the site of the dose or the screening that month, or
N/A. - For a green tile: Dose #, Date, Age at that date and Dosage Batch.
- For a pale-green tile: Dose # marked (prior — paper register) and a note that the dose is based on the guardian’s recall and was not recorded digitally.
- Saved Remarks: every note for that month, newest first. Each shows Added by: (the staff member’s name), On: (date and time) and the text. If there are none you see No remarks for this month yet.
- A text box, Add a remark…, and an Add Remark button. The button stays greyed out until you type something.
Adding a remark
Section titled “Adding a remark”- Open the window from a tile, or from Study & Analysis.
- Type the note. Keep it short: what happened, and what should happen next.
- Click Add Remark. The note appears at the top of Saved Remarks and the text box clears. You can add another straight away.
Remarks cannot be edited or deleted. They are a permanent log, and each one is written to the audit log with your name. If you make a mistake, add a second remark that corrects it.
Study & Analysis and the month picker
Section titled “Study & Analysis and the month picker”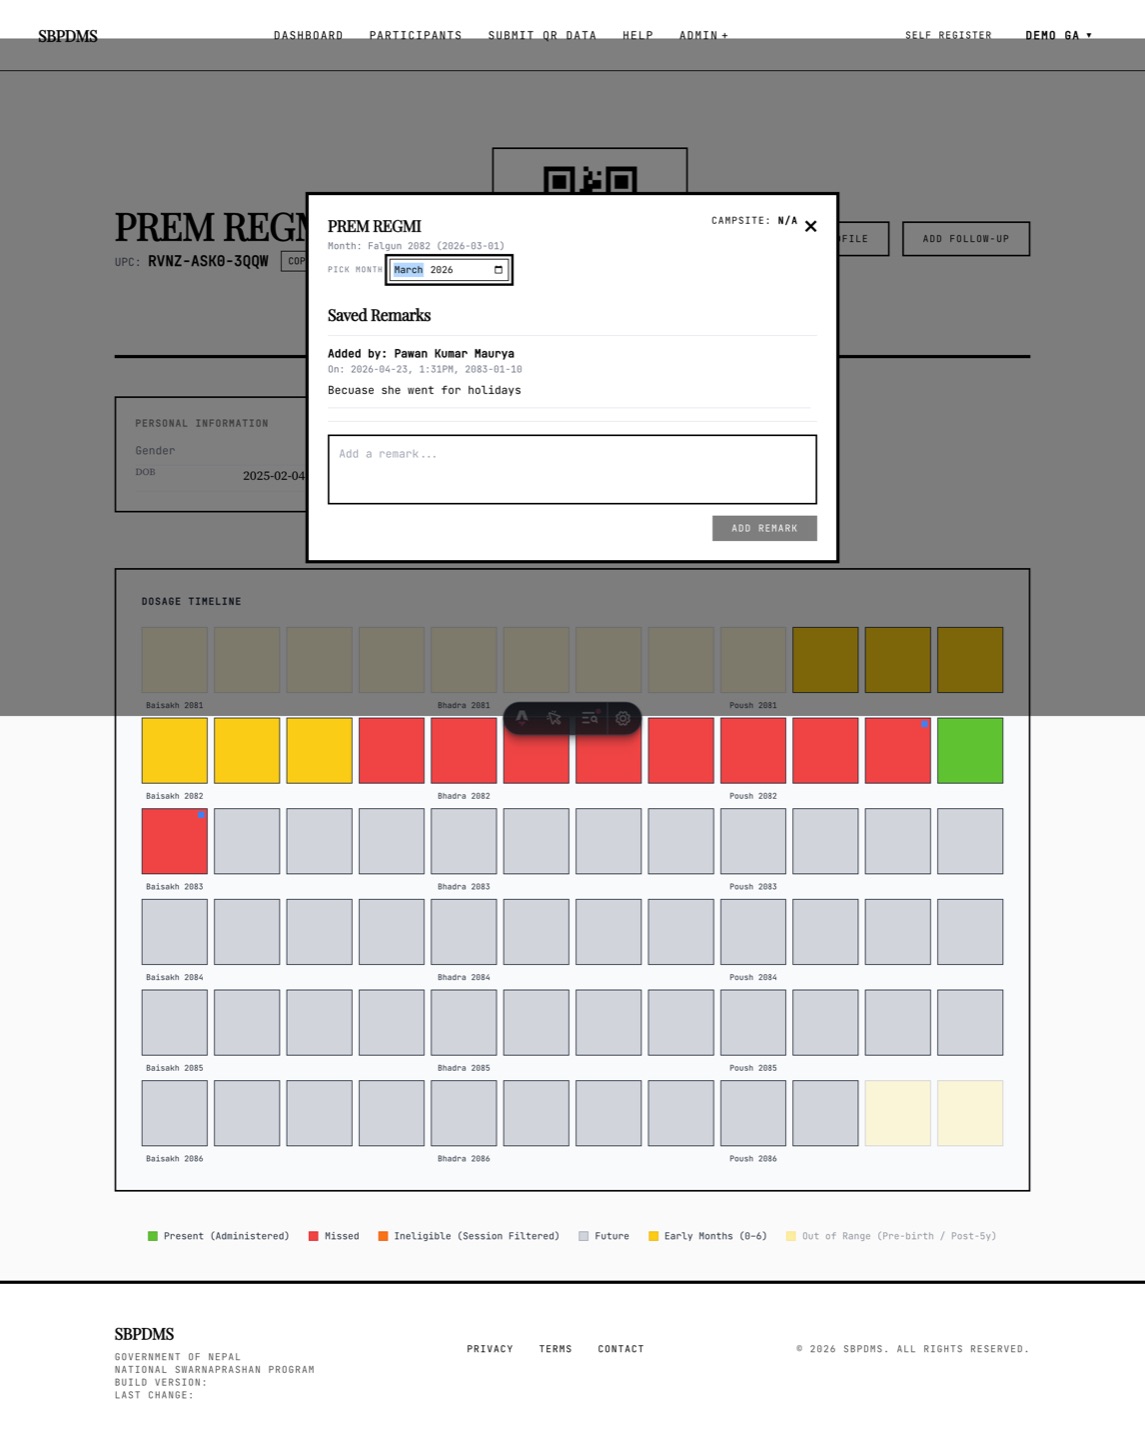 After choosing a different month, the Saved Remarks list refreshes to that month.
Study & Analysis opens the same window with two differences: the month is set to the current month, and a Pick month control appears under the month label. Change the month there to read or add notes for any month, past or future, even one that has no tile. Campsite shows N/A because no single site applies.
Closing the window
Section titled “Closing the window”- Click the × in the top-right corner, or
- Press Esc.
Clicking the dark background does not close the remarks window. This is deliberate, so you cannot lose a half-typed note with a stray click. The Change Verification Campsite window, by contrast, closes on Esc, Cancel, × or a click outside it.
Printing the whole profile
Section titled “Printing the whole profile”Use your browser’s print command (Ctrl+P or Cmd+P) without clicking the QR card’s Print button. The page header, footer, buttons and QR toolbar are dropped, and the details and timeline are laid out to fit an A4 sheet.