Finding your way around
Every page in SBDMS has the same header at the top and the same footer at the bottom. Between them sits the page itself. This page walks through the header, the dashboard you land on after login, and the footer. It applies to all signed-in roles.
The header
Section titled “The header”The header stays fixed at the top while you scroll.
Left: the SBPDMS mark
Section titled “Left: the SBPDMS mark”Click SBPDMS at the far left to go to the public landing page. When you are signed in you usually want Dashboard instead.
Middle: the main links
Section titled “Middle: the main links”These appear only when you are signed in.
- Dashboard — the Action Board. Your home page.
- Participants — the directory of children and guardians.
- Submit QR Data — the staff side of the QR scanning flow.
- Org Prashan — dosing a whole school or children’s home from a list loaded earlier.
- Admin + — a dropdown of admin pages. For a GeneralUser the label reads Core Data + instead, because they can read but not manage. The
+turns into−while the dropdown is open.
The Admin dropdown
Section titled “The Admin dropdown”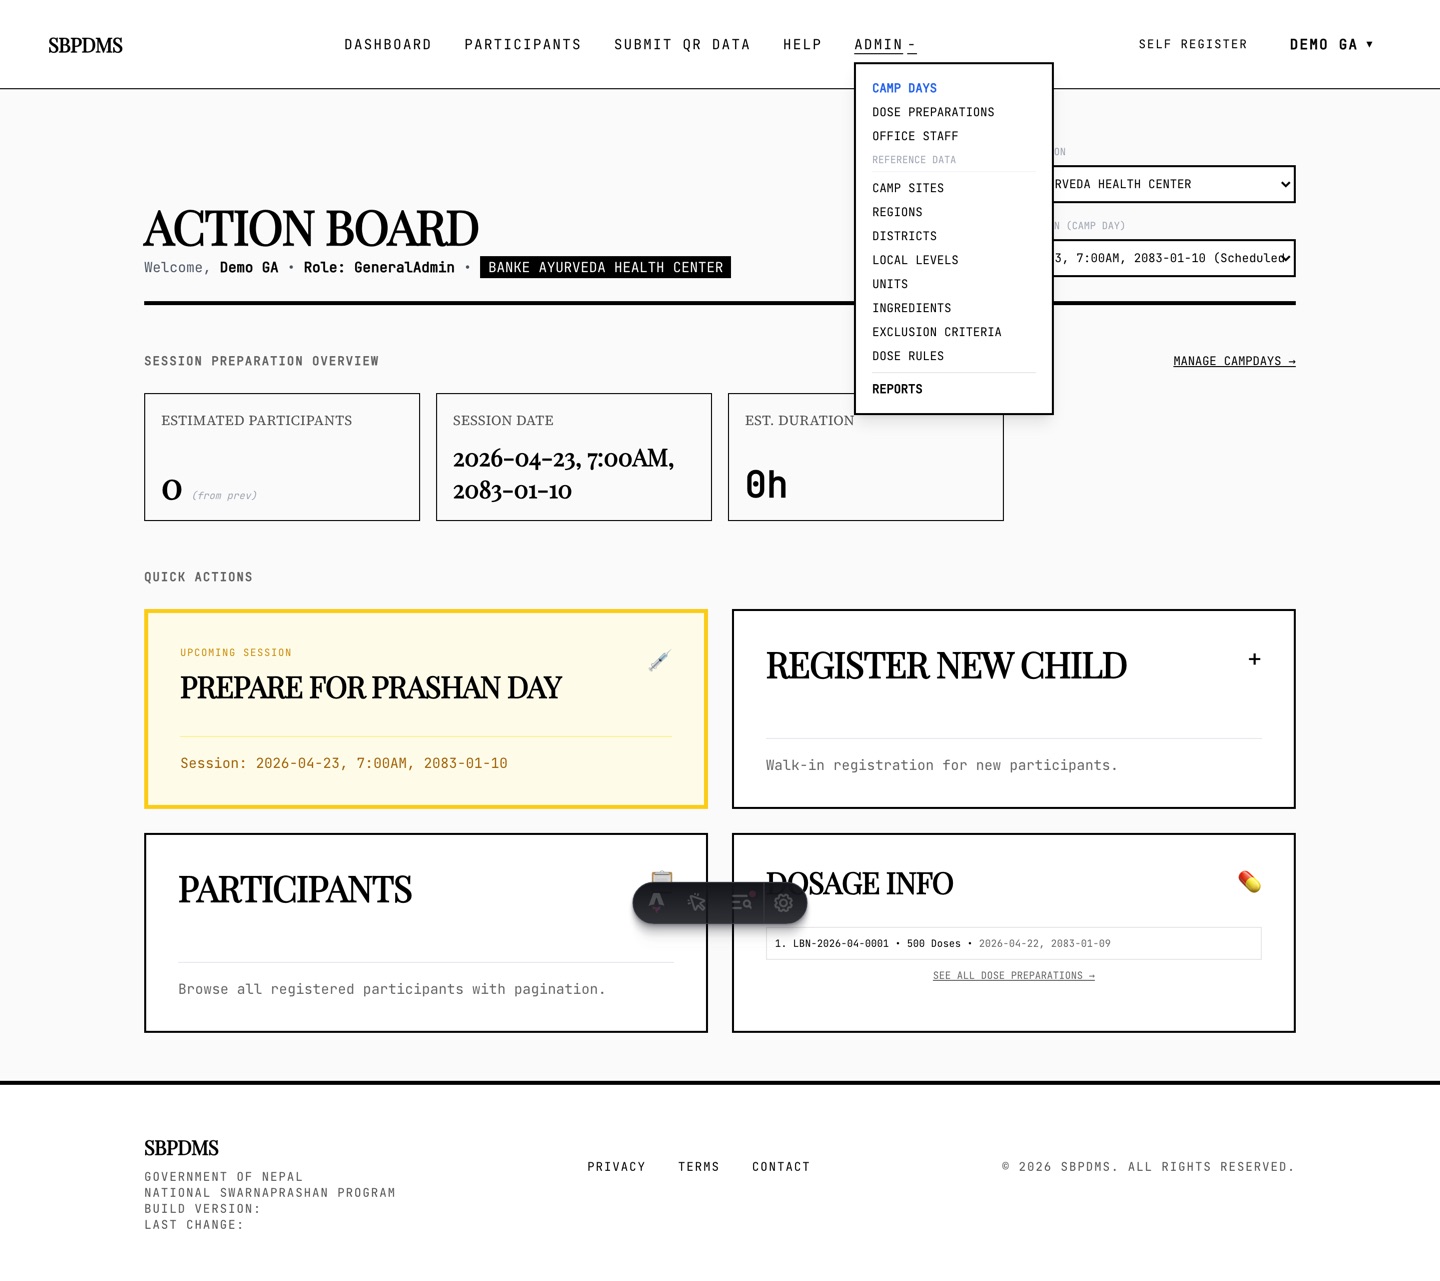 The Admin dropdown as a GeneralAdmin sees it. The three most-used pages sit at the top.
The items are in the order you use them when setting up a Prashan day:
- Camp Days — in bold blue, because it is the most-used page.
- Dose Preparations
- Office Staff
- A small Reference Data label, then Camp Sites, Regions, Districts, Local Levels, Units, Ingredients, Exclusion Criteria, Dose Rules.
- Reports — SuperAdmin, GeneralAdmin and LocationAdmin only.
- Data Import and Import Org Children — SuperAdmin and GeneralAdmin only.
A GeneralUser sees the same list minus Reports and the imports, under the name Core Data.
Right: Self Register and your name
Section titled “Right: Self Register and your name”- Self Register — visible to everyone, signed in or not. Opens the public registration form. Handy when a parent arrives without a phone and you register the child for them.
- Login — shown when you are signed out.
- Your name ▼ — shown when you are signed in. Click it to open the user menu: your
@username, your role, your Assigned Locations (LocationAdmin and GeneralUser only), and Logout.
On the Self Register page only, two checkboxes labelled English and Nepali also appear here. See Conventions.
On a phone
Section titled “On a phone”On narrow screens the links collapse behind a three-line button at the top right. Tap it for a full-screen menu with the same links, a collapsible Admin (or Core Data) box, and your name, role and Logout at the bottom. Tap the same button (now an X) to close it.
Keyboard users
Section titled “Keyboard users”Press Tab once when a page loads and a black Skip to content bar appears at the top left. Press Enter to jump past the header.
The dashboard (Action Board)
Section titled “The dashboard (Action Board)”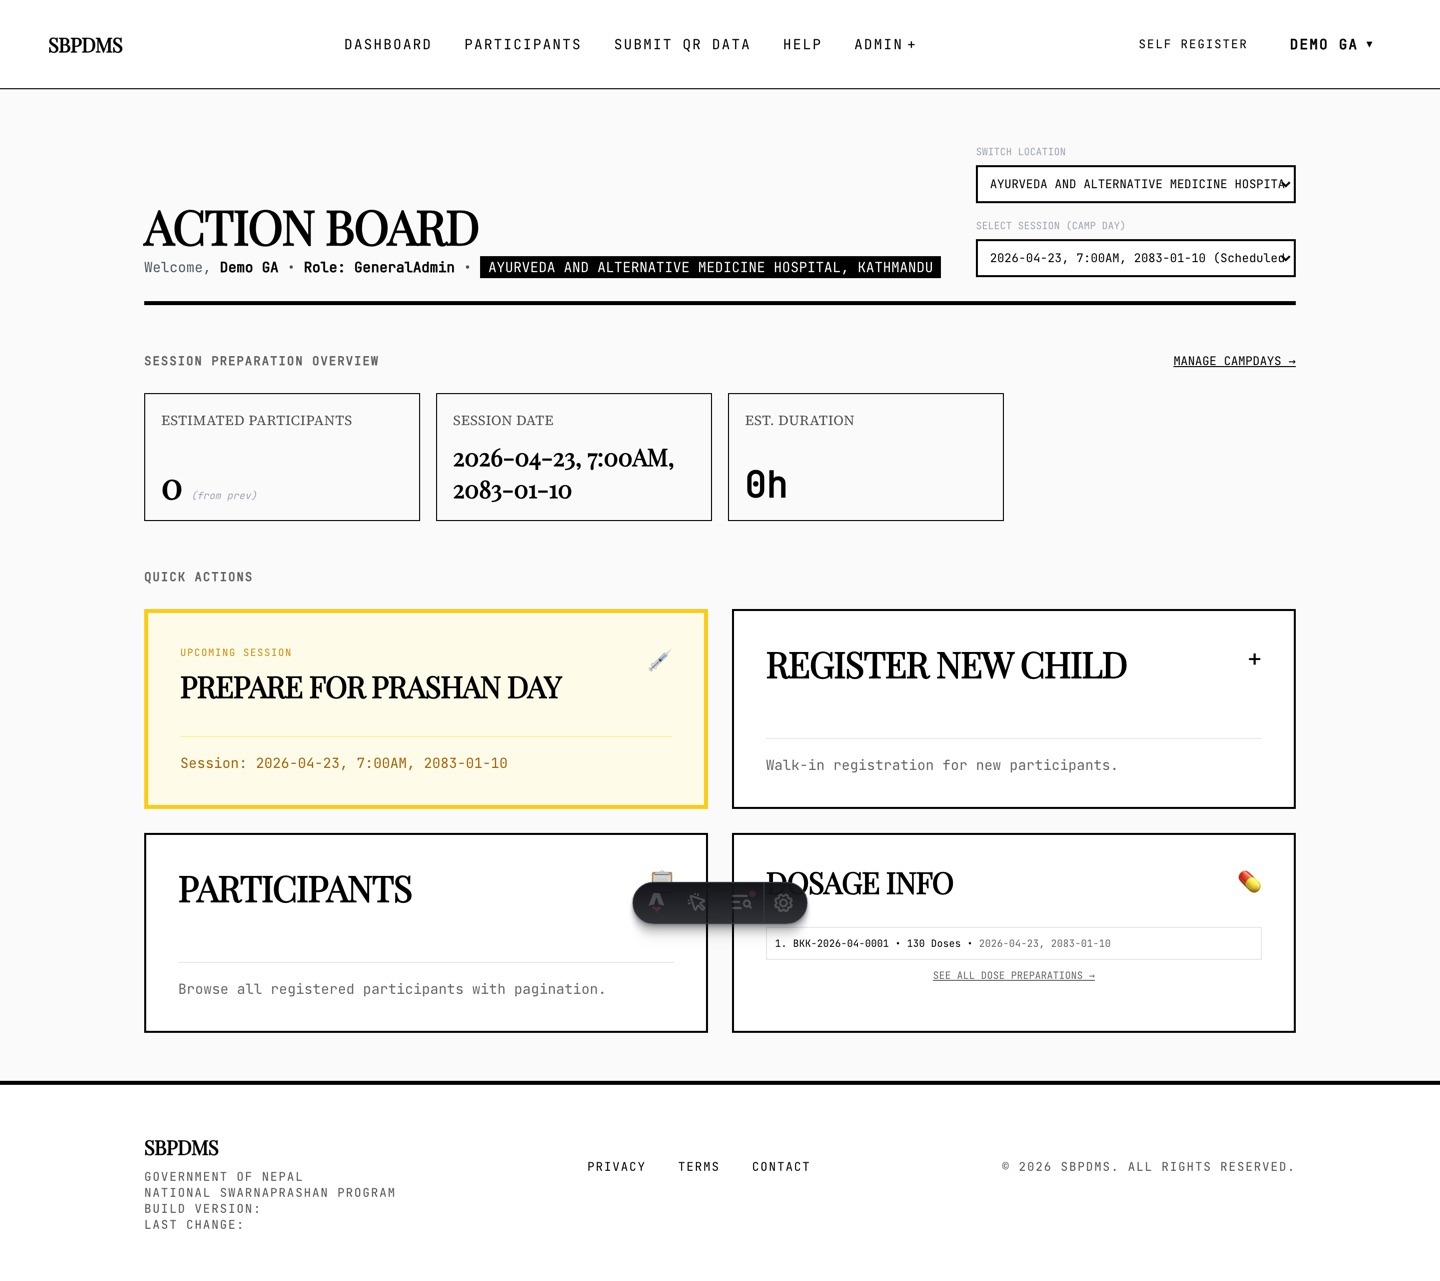 The Action Board. Name and role at the top left, the site and camp-day dropdowns at the top right, the stats grid below, then the quick-action cards.
You land here after login. To come back, click Dashboard in the header.
The top line reads Welcome, [your name] • Role: [your role] • [site name]. The black site badge is the site whose numbers you are looking at.
Switch Location
Section titled “Switch Location”At the top right. It appears only if you have more than one camp site to choose from: every site for SuperAdmin and GeneralAdmin, your assigned sites for LocationAdmin and GeneralUser. If you have exactly one site the dropdown is hidden and that site is used.
Pick a site and the camp-day dropdown and the stats grid reload for that site. Your choice is not saved; reloading the page goes back to the first site in the list.
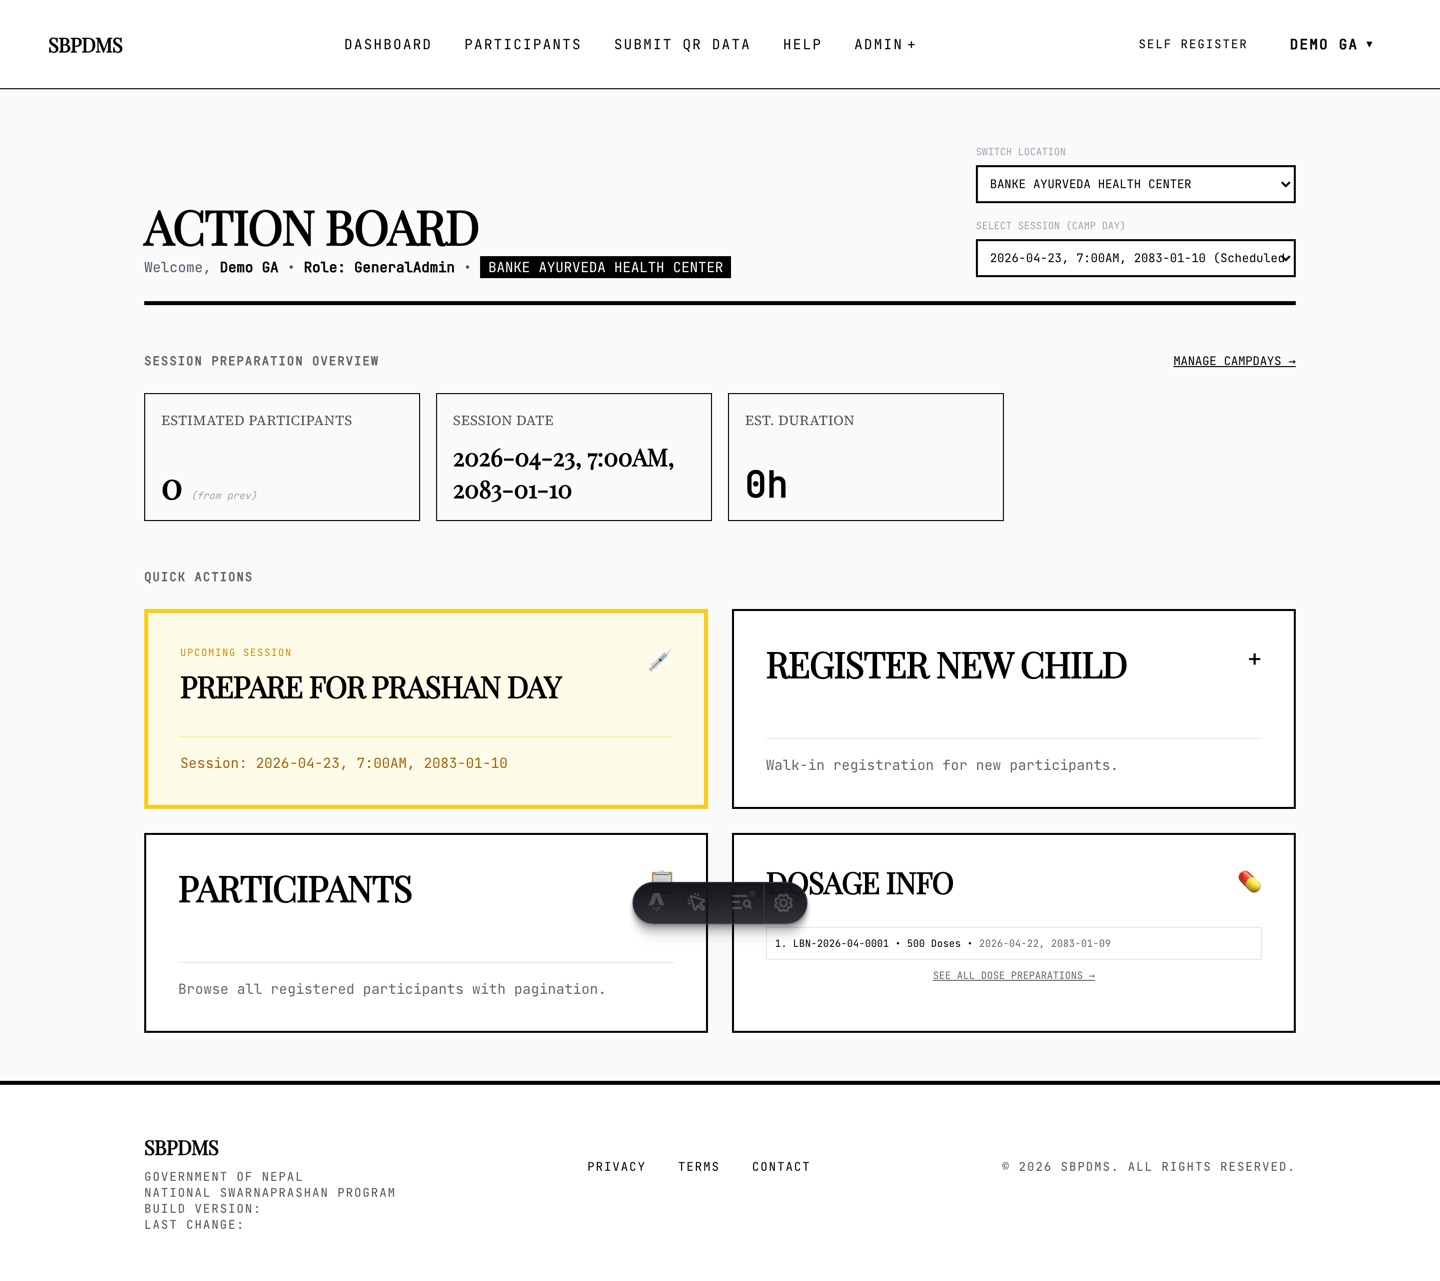 After picking another site in Switch Location. The stats and cards now show that site’s data.
Select Session (Camp Day)
Section titled “Select Session (Camp Day)”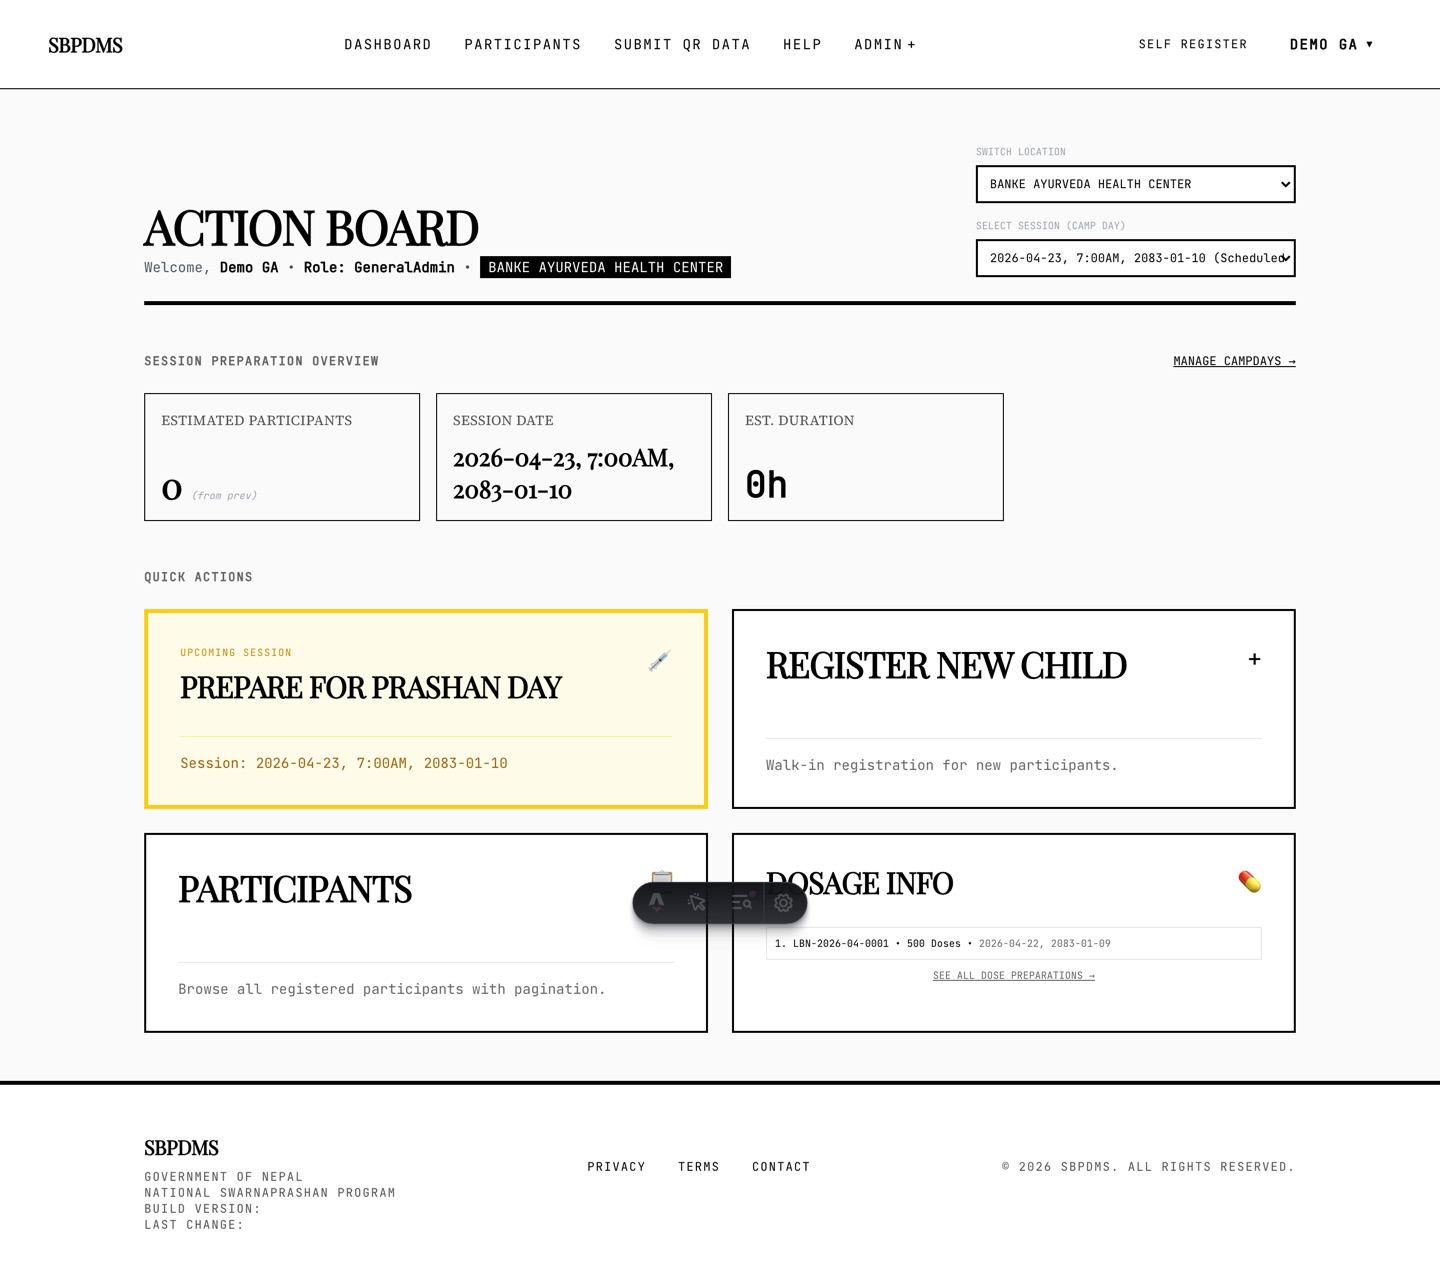 The camp-day dropdown. The single next camp day is prefixed “Upcoming ·”; past days follow, newest first.
Below the site selector. It lists:
- One upcoming camp day — the next one at this site, prefixed
Upcoming ·. - Every past camp day at this site, newest first.
Camp days further in the future are not listed; on the day you only care about “today” or “the next one”. Each entry shows the AD date, the start time, the BS date and the status in brackets, for example 2026-04-23, 7:00AM, 2083-01-10 (Scheduled).
While loading it reads Loading sessions…. If the site has never had a camp day it reads No sessions found.
The default choice is the upcoming day if there is one, otherwise the most recent past day. Changing it reloads the stats grid and re-points the Prashan-day links.
The stats grid
Section titled “The stats grid”Four cards. The heading and the cards change depending on whether the chosen camp day is still ahead or has started.
| Chosen day is upcoming: Session Preparation Overview | Chosen day has started or finished: Camp Day Performance |
|---|---|
Estimated Participants with (from prev) — the count from the last camp day at this site |
Total Participants — children with a session on this day |
| (no Verified card) | Verified — how many of them are verified children |
| Session Date — start date and time, AD and BS | Session Date |
| Est. Duration — planned hours | Session Duration — hours |
A camp day counts as “started” once its start time has passed, so on the morning of a Prashan day the grid switches to Camp Day Performance by itself.
To the right of the heading is a small underlined Manage Campdays → link. It opens Admin → Camp Days, where camp days are created and edited (read-only for a GeneralUser).
The numbers refresh only when the page loads or you change a dropdown. Reload the page for fresh numbers.
The Prashan Day banner
Section titled “The Prashan Day banner”When the chosen camp day has started, a wide black banner appears under the stats: NOW ACTIVE — Prashan Day — Start dose flow for today’s session, with the session date on the right. Click anywhere on it to open the Prashan page for that camp day.
Quick Actions
Section titled “Quick Actions”Below the banner is a grid of cards.
- Participants — opens the directory of children and guardians.
- Register New Child — opens the same public registration form as Self Register, for walk-in families.
- UPCOMING SESSION — Search & Update Information (yellow border) — shown only while the chosen day is still upcoming. Opens the Prashan page for that day so you can find and verify children in advance.
- Dosage Info — for an upcoming day, lists the dose batches attached to it (batch code, quantity and unit, prepared date), each a link to that batch. If none are attached it says Not prepared yet in red. For a started or finished day it reads Session finalized. See historical dose records in reports. Under either, See all Dose Preparations → opens Admin → Dose Preparations.
- Reports — shown for a started or finished day.
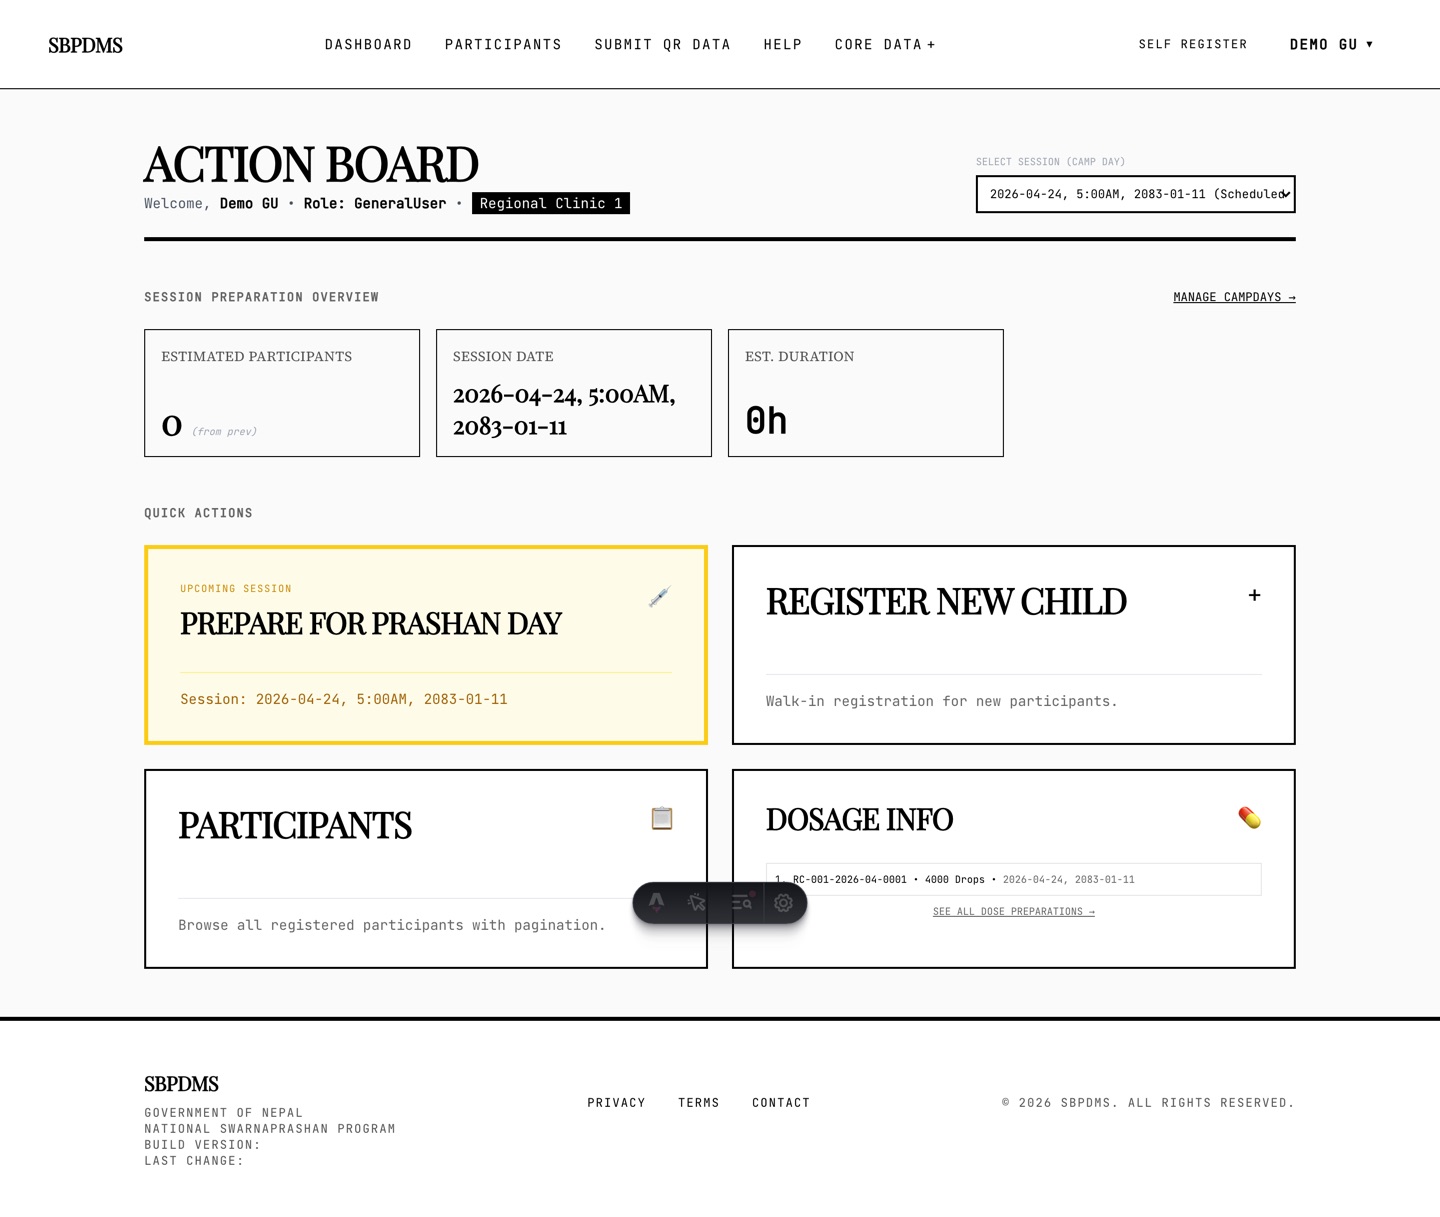 A GeneralUser’s dashboard. Same layout, limited to their assigned site, with the Core Data dropdown in the header.
The footer
Section titled “The footer”At the bottom of every page, including the login page:
- SBPDMS mark (also a link home) and the line Government of Nepal — Swarnabindu Prashan Ayurveda Program.
- Explore Features — opens a pop-up listing the system’s modules and headline numbers.
- Help — opens the in-app operator guide, a short version of this site. It works without logging in.
- Theme toggle — a small coloured square followed by Olive or Mono. Click it to switch between the default olive-green ink and plain black and white. Hovering shows Switch to black & white or Switch to olive green. The choice is kept in a cookie for a year on that browser.
- Contact — opens a pop-up with the maintainer’s contact details.
- Build Version and Last Change — the seven-character code and the note of the newest change in the running software. Quote the build version when you report a problem.
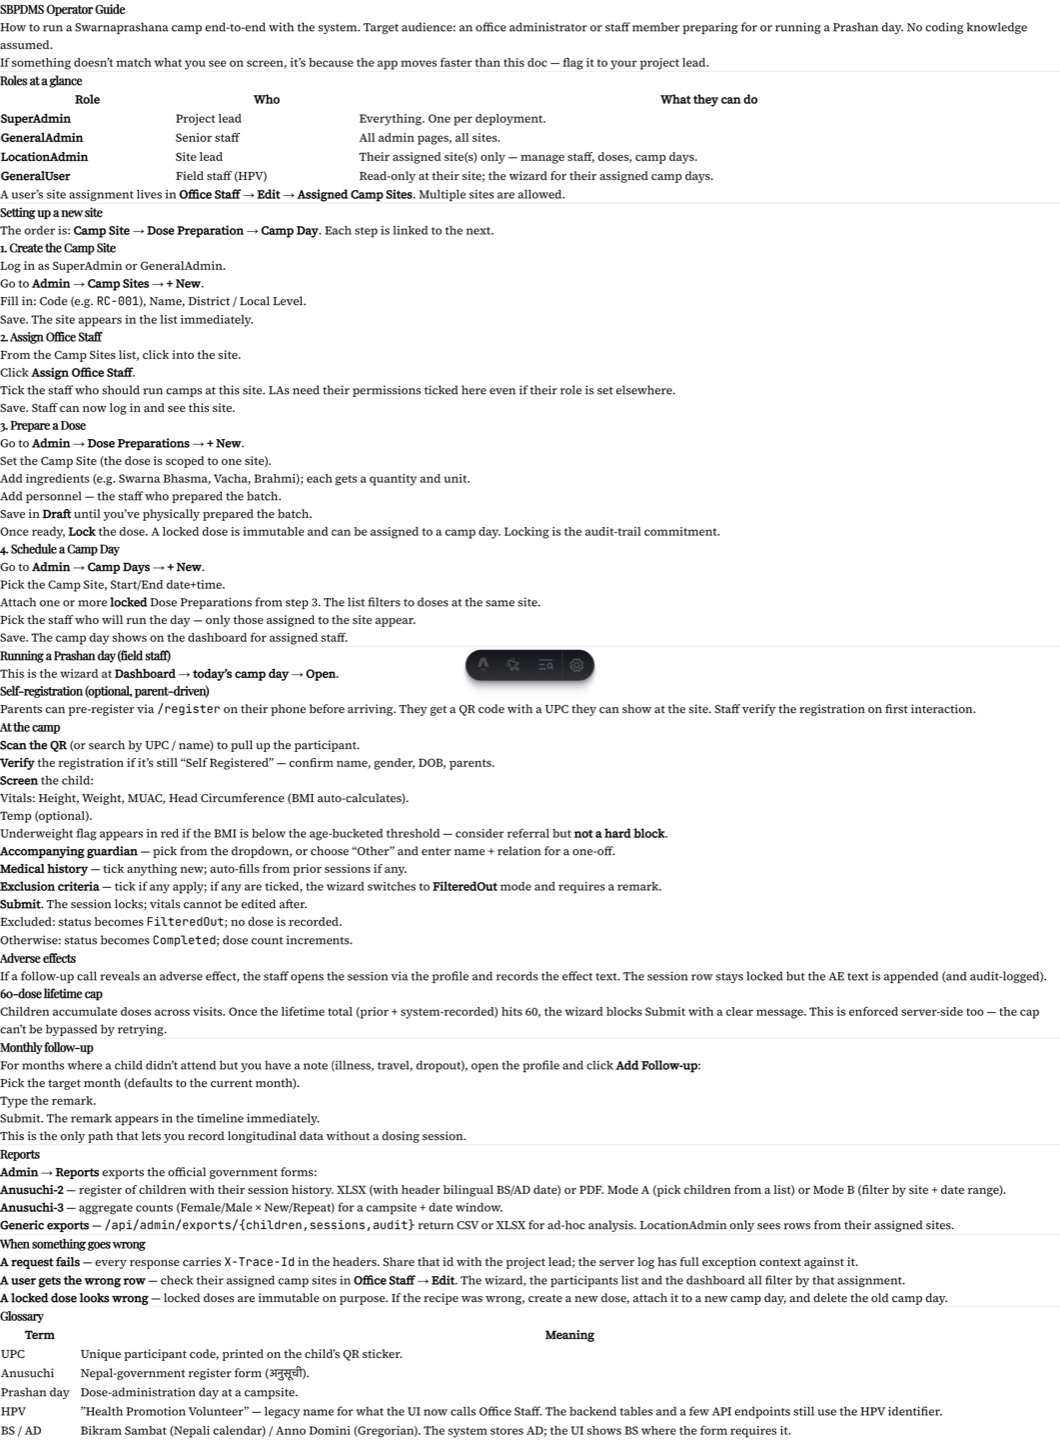 The Help page opened from the footer. A sticky table of contents on the left, the guide on the right.
Error pages
Section titled “Error pages”A wrong address, or a record your role cannot see, gives a Page not found screen. A server fault gives a 500 page. Both keep the normal header so you can carry on.